A Really Big Mug

DSCN5430

Feast or famine. Or rather, famine…famine…famine…FEAST! The mugs I throw on the wheel usually come out way too small. So, as the second project in the handbuilding class, I made a mug. I rolled out some clay, stamped it using an interesting looking patterned mat, then wrapped it around a big cardboard tube.  I was hoping for a bit of shrinkage, but for once, got very little. My son likes to drink beer out of this mug. I think it will hold at least 12 ounces. I go for tea in this one.

A Bread Project

I was bad. After the first handbuilding class this summer, I decided not to do the recommended class projects and to maverick off on my own. As a result, I spent a lot of time on just a few projects, but they were things I was interested in and could use. I spent quite a bit of time on this first project: a bowl insert for my dutch oven for making sourdough bread.

What prompted this? Around the same time I took up pottery, I also dived into sourdough breadmaking–you know, the make your own starter kind of thing. As with pottery, it has taken me months and months to get the sourdough bread right. I finally got my recipe and technique down, but I was having trouble getting a properly plump loaf of bread because my dutch oven is too big. My breads were coming out flat because I was tending to dump the dough into the (extremely) hot pot from too high a height. Not wanting to buy a smaller dutch oven, I saw an opportunity to apply some engineering using pottery.

I think just about everyone in the studio got involved in this project to some degree or another. Most eyed it as likely to fail at every stage, including my instructor! but one fellow kept encouraging me to keep going and provided me with some really good suggestions. The first time I built this piece, I draped pieces of clay over the top of a large aluminum bowl. Upon taking it off, the whole thing sagged and fell apart. Ugh. Discouraged. Thought about dumping the whole thing. Picked myself up. Started over again. Collecting the still wet enough pieces (i.e., the strips and circles), I reconstructed the bowl inside the aluminum bowl instead of on top of it. My friend taught me how to “weld” the clay so that the structure would stay put. When I removed the piece from the bowl the next time–voila!–I could work on the bottom welding without collapse. Hours and hours more of smoothing, sanding, drying, glazing, and here is the result. Not perfectly round, but it worked like a charm.

I’m happy to report that the ceramic bowl fit inside of my dutch oven like I had measured ahead of time for size and shrinkage (I’m not that good yet). Lucky me! I eyeballed it and it fits like a glove. AND, it did not blow up in the 500 degree oven inside my pot! AND, the bread came out fat and beautiful with little feet on the bottom where it crept through the holes. I fully expect it to taste good as well.

Toad House

DSCN5424This was a combination wheel/handbuilding project. I threw a closed form (my first one), then proceeded to make this toad house. It was sort of a class project. When I cut into my closed form, I found it to be a half inch thick! Oops. I think my closed forms need some work.

This completely underglazed little house was supposed to be a bit brighter. I actually used red underglaze on the bottom half of the roof. It seems to have been overwhelmed by the brown. Still learning. My favorite feature is the extruded clay (a friend had a small extruder) that I used on the roof and the base and painted light green. This house now has a place of honor under our mailbox. Hope the toads can find it.


Happy Accident

DSCN5412

I was trying to create a large, flat baking dish. As you can see, this is not a large, flat baking dish. Somehow, the bottom fell out while still on the wheel. A fellow potter at the studio implored me not to throw away the pieces, but to create a “happy accident” piece. And here is the result. The sides were from the original baking dish. I cut out a bottom from the separated bottom of the dish and “glued” it to the bottom of the accident. Voila!

Notice the red interior. I glazed this one at the same time I did the experimental red flower pot from the last post. In this one, I wanted to see how the red (very red as the interior bowl cooled down slower) would look next to the teal color. Very southwestern I think. I might plant a cactus in the middle and place stones in the outside ring.

I took a class in handbuilding this summer. This piece was a forerunner.

Red on Red

DSCN5415

So because I bombed out on Randy’s Red glaze on red clay on the jewelry and learned about the glaze needing a higher temperature, I tested out the theory on a red clay pot with a nice deep inside. On this planter (in which I forgot to poke a drainage hole–argh–my husband had to bail me out with his drill), the red on the inside came out beautiful. There is even a bit showing on the outside where the pot must have been close enough to something else to allow it to cool down more slowly. Not displeased with this pot (missing hole notwithstanding). Notice that it is also larger than my usual pots!

A Stab at Jewelry

DSCN5418

I’d been wanting to try some red clay mainly because people kept telling me that the Randy’s Red glaze, while looking murky on other clay types, looks great on red clay. Red is my favorite color. I wanted to make some truly red glazed pots without using the underglaze crutch. And then a friend offered me the use of some of her surplus red clay, plus I got a windfall of free red clay that had been abandoned after a class had ended.  It was time to try red.

Lesson learned #1: When clay has dried out some, don’t try to work with it like that unless you’ve been bench pressing for a while. Tried. Failed. I had to wet the clay AND throw some wet paper towels in the bag for a couple of days to moisten the clay enough so that I could work with it.

Lesson learned #2: Wear old clothes to the studio on the day you plan on working with red clay. It’s a mess to work with and it stains clothing.

Lesson #3: Learn to shout “red clay incoming!” when you are throwing  on a wheel next to others who are working with paler clay types. I had experienced being at the wheel next to a red clay thrower when I was working with porcelain and already knew how that could turn out. I throw wet. I’m sure everyone within range of my soggy flying red clay received some on their white and porcelain pots, too.

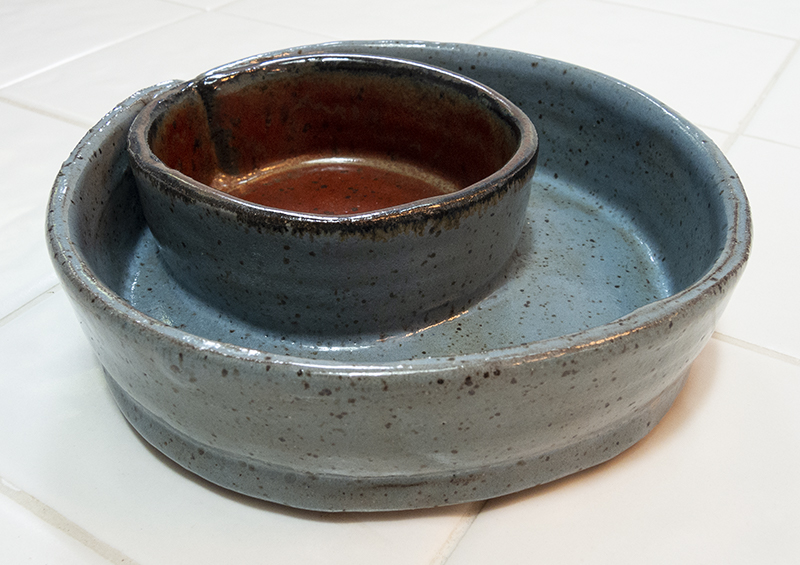
Lesson #4: Randy’s Red is apparently a cone 7 glaze. Our studio fires only to cone 6. Randy’s Red looks murky unless the piece it’s on is boxed in or the glaze is used on the inside of something so that the cooling down is slower and hotter.

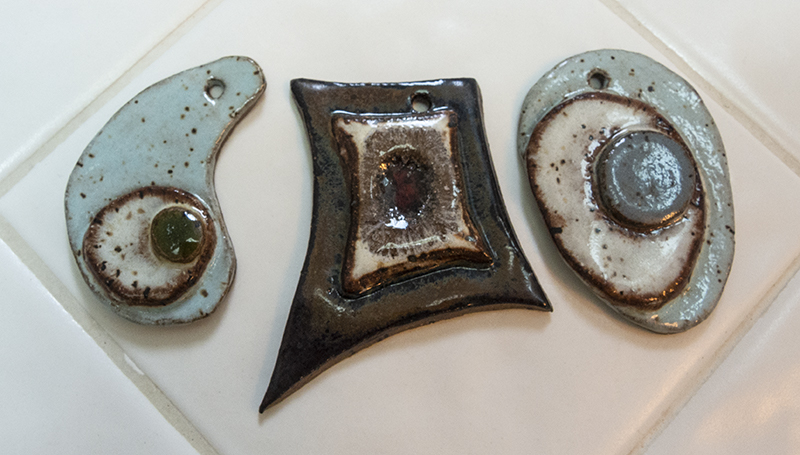
My first project with red clay was jewelry pendants. Of course, I used Randy’s Red on the pointy piece in the middle and was surprised to get murk. That’s when I learned Lesson #4 from one of the studio monitors. In fact, she told me all of the things I had done wrong, which was just about everything.

I had never used the slab roller until this project. As my pieces were starting to curl up on the edges when drying, the monitor explained to me that I needed to roll out the slab in all directions to settle down the clay particles. Oh well. Too late. I covered my pieces with a board and piled on some heavy pots I was working on. It helped. The pieces flattened out.

I wanted to use some glass on one of the pieces, so I dug a hole and placed a tiny piece of red glass in it. At the pre-bisque stage. No one I talked to had ever done this at the pre-bisque stage, so of course I wanted to see how it would turn out. The bisque firing was fine. It was during the glaze firing that I got the brown starburst on the white glaze. In my opinion it ruins the effect, but someone else may like it. I think I’ll stick to glass after bisquing next time.

Next came Lesson #5, which was that red clay may not necessarily be the best clay to use when making jewelry. The white glaze pulled away from the edges and prominently showed the red clay. It came out a bit organic for my taste. But maybe someone else will like it. Maybe Lesson #6 is be wary of white glaze on red clay unless you don’t mind that particular organic look.
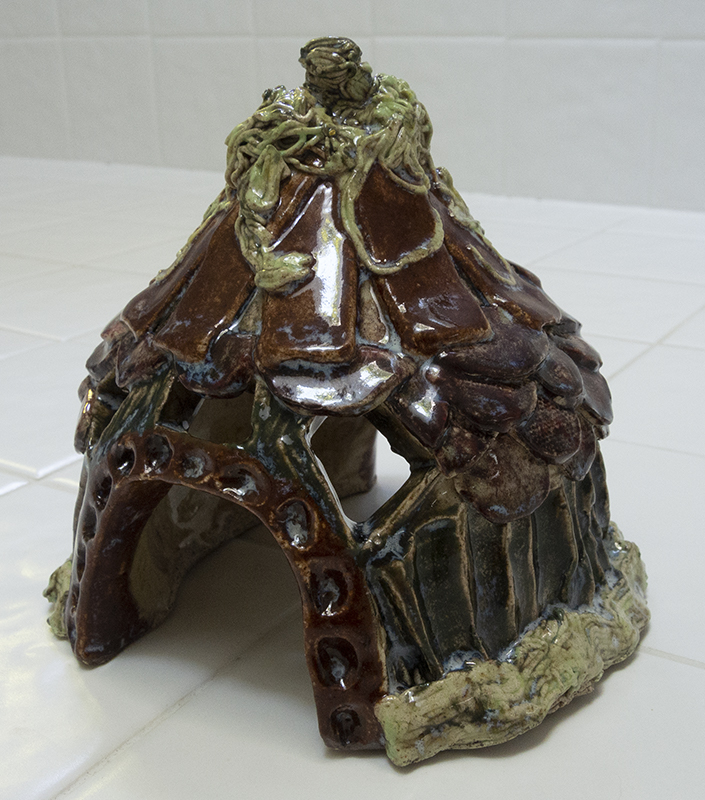


Wiggle Wiring

These two planters are my other creations from the two-day workshop I took back in May. They were my attempts at using wiggle wires, which look like thin wires that have been wrapped around varying sizes of narrow cylinders–think distended small-fry Slinky (for those of you old enough to remember Slinky). My pots came out looking nothing like what the instructor demonstrated, but that is because I became impatient with the technique, which requires dragging the wiggle wires through intentionally thick wet walls to carve out a pattern. As you can see, my patterns became very abstract. Hmph.

The other thing I experimented with was soda ash glaze over gray clay painted with some underglazes. When applying soda ash, each of three coats or more need to dry thoroughly between applications and then the pot needs to cure for a week or so before glaze firing. The pot on the right with the plant in it was done correctly. The larger one on the left got snatched up for glazing only a day after soda ash application and didn’t turn out right. You can see that it’s not as shiny as the other one. Trials and tribulations of being at the mercy of others in charge of the studio where you work.

I will have to try soda ash again on red clay sometime. It’s supposed to look best on that type of clay. Not particularly interested in using  wiggle wires again any time soon though.