Another Small Korean Pot

DSCN5293

I keep making this shape because I like it and because it’s challenging and because it provides endless possibilities. Mine are still small as I haven’t quite mastered the larger lumps of clay for this type of pot. This one is balanced with a normal (not heavy) bottom.

This one is made of porcelain. I’m doing better with porcelain by not using very much water. It’s not my favorite clay to throw though.

Photo Essay on a Salt Firing Workshop, Part II

The anticipated day finally arrived and we all arrived at the salt kiln bright and early on a Saturday morning. What a feast for the eyes and for the spirit! All those beautiful salt-fired pieces slowly emerging as the bricks were removed one by one to reveal them! There were, of course, a few disappointments for one reason or another, but most of the work was lovely and successful.

After the proper amount of oohing and aahing and admiring of our own and each others’ pieces, we had to get to work again, cleaning up the shelves and preparing them for the next salt firing session. This entailed chipping off recalcitrant wads that had baked on and sanding all of the salt off. A new coating of…something…had to be painted back onto the bottoms (sorry, I wasn’t involved in this task). Some of us also had to grind off some problematic spots on the outsides of our pieces. Being the newest newbie to pottery, I had more than my share. Next time (and I’m certain there will be a next time), I will be more careful about where I place those infernal wads. One fell off into my pot, several stuck to glaze where lids were concerned, and they just generally gave me grief. But nothing that couldn’t be rectified with a little elbow grease.

The other thing I personally learned is that clay that bakes to a brown color is much better than a white porcelain type clay for salt firing. I used two different clays: Phoenix (bakes to a toasty brown) and Loafer’s Glory (always white). I loved the Phoenix pieces, but didn’t care for the white pieces as they turned out much like any other white clay piece I would fire in an electric kiln at a lower temperature. They enjoyed none of the cool salt effects. Next time, only brown.

And there we are: the grinning, happy salt firers (plus dog) at the end of our two weekends of fun.

Photo Essay on a Salt Firing Workshop, Part I

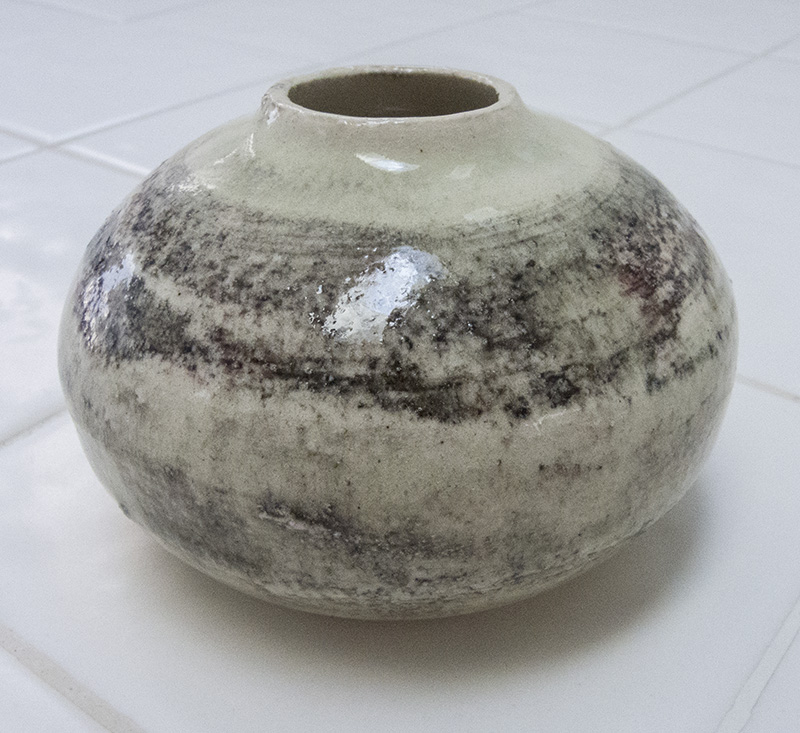
These are photos from Marianne Cordyack’s salt firing workshop that I attended in West Virginia. And this is the reason why I haven’t posted any new pots in a while. I’ve been making pots for this workshop. Next week: the motherload. I’m told that unloading the kiln is like Christmas morning. I’m very excited to see the results!

The salt process is very interesting and quite manual all the way through. After individually making and bisque firing our pots at our local studios, we convened at Maryanne’s WVA studio to spend a few hours decorating and glazing. (At the end, it became quite a rush as each of us had 20+ pots!) Then we had to make “wads,” small bits of rolled clay (a recipe made from alumina hydrate, sand, flour, and two other ingredients I don’t remember) to glue to the bottom of pots so they don’t stick to the shelves during firing. Larger wads buffer the shelf bricks and the shelves. The kiln is homemade from special bricks that can be heated to very high temperatures and attached to a gas line. The loading of pots into the kiln took all afternoon and evening as each pot had to be carefully placed depending on its size, the type of clay used to make it, and the glaze used on it. Some needed to go nearer to or farther from the heat source than others, nearer the front of the kiln or in the back, etc. Lots of discussion and rearranging! The next big job was to brick up the front of the kiln. We didn’t finish until after 10 p.m..

The kiln was fired up at 5:30 a.m. the next morning. Then it was a job of monitoring the heat on the inside of the kiln by keeping an eye on the special clay cones placed in three strategic places within the kiln. When cone 11 bent over, the fire was hot enough to add the specially prepared rock salt (water softener salt ground up in a blender), 10 or 15 times (can’t remember exactly how many times–I was taking photos, not notes) in 10-minute increments. It was dump and run to get away from the salt fumes each time. The salt causes flashing to take place, with the result being speckles on the pots. It takes a few days for the kiln to cool down enough to unload.

Can’t wait for next Saturday!

A Porcelain Cup

I’m still feeling my way with porcelain. I have a lot more pieces in progress, but this cup is one of my earliest attempts. A bit lumpy to the feel inside, but otherwise mostly okay. I was looking forward to experimenting with glaze on porcelain as I was expecting to get more saturated colors. This early test did not disappoint. I started with Randy’s Red on the inside. On the outside, I painted on bands of the red, my old friend eggshell, brown, and then more red. Then I dipped the top half of the cup in frosty matte, which tends to run colors together (which is what I wanted). Voila! It worked!

Still need a lot more practice making handles…