End of the Semester

DSCN4713

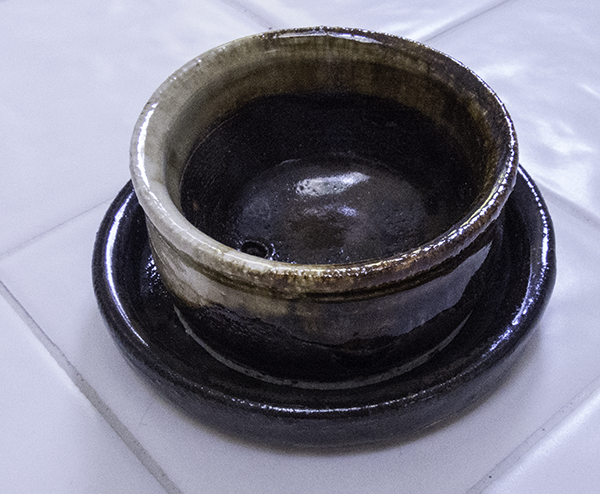
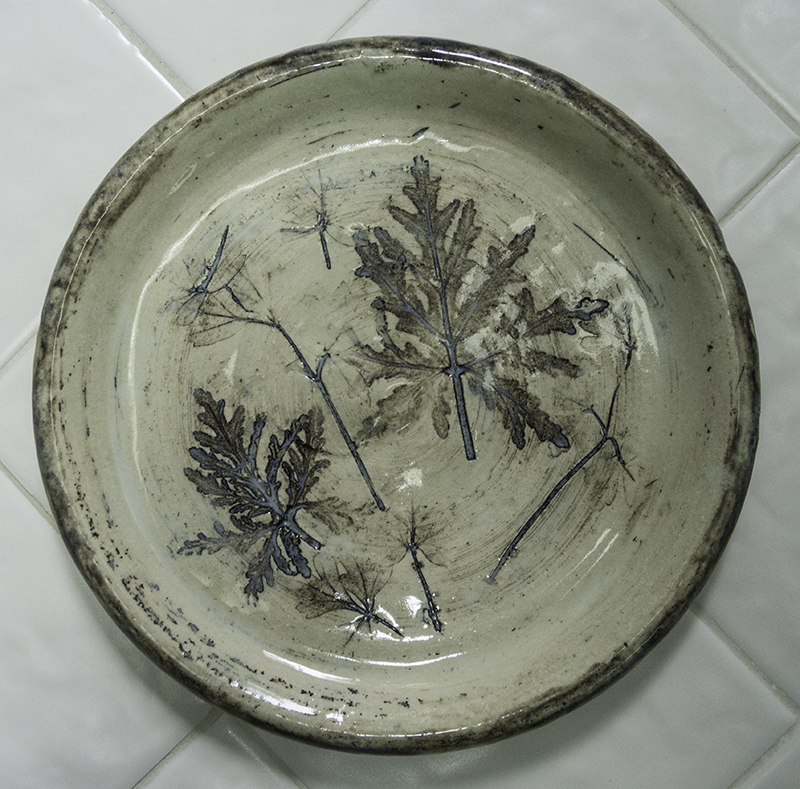
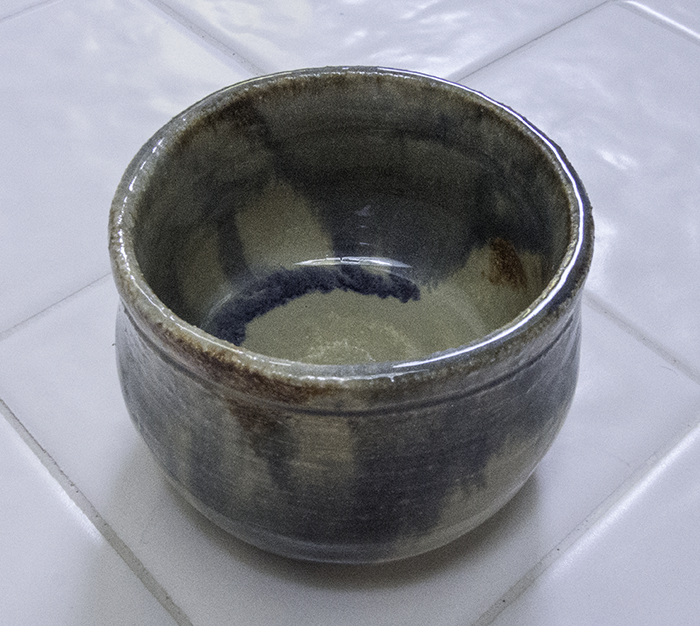
Here is yet one more small pot, this one with no hole. Not sure what I’m going to do with it, but it looks nice. It’s pretty straight and it’s only a little heavy on the bottom–not bad. I think I was getting the hang of pulling the bottom out when I had to stop throwing for the summer. I ran into the same glaze trouble as with the small planter with plate in the last post. I wonder what was going on in that kiln because I dipped both of these pots pretty evenly, although I may have applied a finger print or two. The glaze didn’t stick in a couple of spots and I got the rusty marks you see here. They were rough, so I patched them and put them back in the fire. Everything smoothed out a bit, but I didn’t get rid of the oxidation. I guess that’s the variance of the clay. I was surprised though as this is white clay, not the sandier, gray #50 clay that is more prone to this kind of thing. I’ve made my peace with the rusty spots of interest though. At least they’re not rough anymore.

This will be my last pottery post until the fall. The studio is closed, alas. I have three more projects that I still need to finish. They are at the bisque stage. But that will be a story for another day.

Tiny Planter

DSCN4714

“Gee, Mom…this bowl is a little small for drinking out of, don’tcha think?”

DSCN4720

Here is a project I worked on for a while until I finished it as well as I could to my satisfaction. I made a little pot, but it was crooked. It didn’t survive. I made a little plate. It came out surprisingly well. I made another little pot to fit inside it. It came out pretty well, too! But then I ran into trouble with the glaze. For some reason, it didn’t stick to the bisqued clay evenly. I patched and had it refired, but this was the best result I could get. The finish is a little rough. I think I’ll put a spiky cactus in it, then it will be okay.

You never know what you’re going to get once a piece comes out of the kiln. Apparently there are many variables, many of them out of the control of the non-kiln owning pottery studio dweller, such as where a piece is placed in the kiln, next to what and of what size, and whether or not the kiln operator set the temperature correctly (not judging here…). You quickly get used to your anticipation changing to a soaring high, hitting bottom (the cracked plate), or stopping somewhere in the middle. But it’s always exciting to see what you get.

Argh!!!

DSCN4704

I can pretend that crack isn’t really there, but…well, it is. It showed up after bisquing as a hairline fracture. I thought maybe I could use the glaze trick again to fill it in, but the crack had plans of its own. It got bigger and even showed up on the bottom of the plate–cheeky thing. According to what I read about cracks, it could have been because of faulty wedging, too much water on the bottom of the plate, uneven clay distribution, clay not compressed enough on the bottom. Probably all of the above.

I also had some problems with the glaze. Even though I bisqued the black design first, this time it decided to run, giving me a driveway pebble effect nearby. The lone design on the opposite side of the plate also blurred and ran down the side of the plate. And, the lighter color glaze pooled a bit into a milky mess. Not happy with the one called “eggshell” so far. It seems to milk up.

The good news: I threw a reasonably round, well-shaped plate. Barring any more of these types of catastrophes, I’ve got a bigger one coming (won’t be ready for prime time until the fall). This particular one is roughly 6 inches in diameter.

Southwestern Sorta

DSCN4683

This pot is still not completely straight, but is a little less thick and better controlled than previous efforts. It’s roughly 3 inches high by 3.5 inches across. The final product might have been better if I had not felt rushed when applying the glaze. I’m up against the end-of-summer pottery studio closing whereby we have to remove all projects and clay by August 19 for their annual scrub-a-dub time. I understand. But. In hindsight, I should have left the glazing until the fall. Oh well.

Lessons learned making this pot:

  • The pot developed the beginnings of the dreaded potter’s “s-crack” at the bottom. Not sure why–maybe I used too much water when working the clay. I need to read up on that problem. It didn’t look too bad, so I attempted to repair it with a clay patch, hoping that a generous glob of glaze would mask and fix the problem.
  • I used a hole punch that was too small to make the hole in the bottom (yes, it was meant to be yet another planter). The generous glob of glaze plugged the hole so that there was no longer a hole.
  • I used the shiny underglaze product again on this pot (same as with Ugly—see previous post). I’m done with this product; the mat underglaze works better when high-temperature glaze is applied over the bisqued product. I don’t like the blurring that occurs with the shiny underglaze. The mat underglaze doesn’t seem to blur.
  • Don’t rush.

I can see the s-crack on the bottom of the pot (it’s a very small one), but not from the inside. I water-tested the pot for a couple of hours and saw not even one drop of leakage. The good news: the glaze glob at the bottom worked. The bad news: I can’t really use this pot as planter unless I put a cactus in it and forget to water it most of the time. (Hmmm…not a bad idea…)

Lost and Then Found

DSCN4679

This pot was missing for a few weeks. I finally pursued finding it because I recalled that it was one of my more reasonably straight, successful efforts. It turned up on the Friday shelf. I am a Thursday girl.

It’s not a big as it looks–roughly five inches across by maybe 4 inches high. I decided that no one needed to see my hand again, but it’s a little bigger than my later batch of small-fry pots. I’m not sure why this one didn’t fall apart as it preceded my efforts to make larger pots later on (that ended up dwindling to smaller pots). Perhaps I stopped while I was ahead (i.e., before I squeezed it too hard in the middle and it lost its top). It’s still a really heavy clunker because I still hadn’t gotten the hang of pulling out the inside bottom to make a true cylinder (still haven’t…), but at least it doesn’t look nuclear on the outside.  A plant in this pot will not blow away in a gale.

If I remember correctly, I did some creative scoring on the outside of the pot to camouflage some of the smoothness inconsistencies I couldn’t seem to get rid of on the outside of the pot, I then applied three different glazes in one glaze firing: spearmint, teal blue, and my old favorite for the scored lines lines, granny’s black shorts.

Another Plate

DSCN4672

This is plate #2. A long time passes between when I create these pieces and when they are actually finished due to multiple firings and having to wait in line to get something fired. I have already created plate #3, which is promising to be so much better–but that’s for a future post.

This plate also belongs in the ancient Roman excavation category, but it at least has some depth. When compared with plate #1, it’s lighter and in fact almost too thin on the bottom, unlike plate #1 which has a thick pot belly in the middle. So, what happened here (i.e., lessons learned)? I tried to trim the bottom of the plate when it was still too wet. I trimmed it too much. It sank in the middle and I almost lost it. I flipped in over and pushed the clay back down, but didn’t do it evenly, hence the bumpy bottom.

I used white clay for this plate. I pressed in the same kind of peppermint geranium leaves I used for plate #1 and some basil leaves (which turned out looking more like pressed insects here).  I painted the bisqued plate with a black underglaze, then wiped off the raised areas, after which I had it bisque-fired again. Then I mixed a tiny bit of yellow glaze with some clear glaze and painted it on the plate, as well as painting on some more of the black around the rim. I probably should have removed the glaze from the very low areas as it pooled into an unsightly milky mess there. Even so, I like this plate better than plate #1.

I’m discovering that I need to throw small amounts of clay–no more than 1-2 lb. I’m just not ready for the larger stuff. This plate is about 8-inches in diameter, about the same as plate #1.