Sculpting with Clay

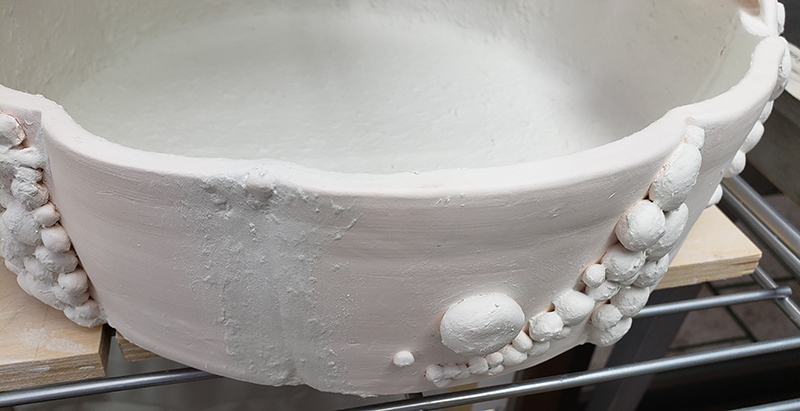
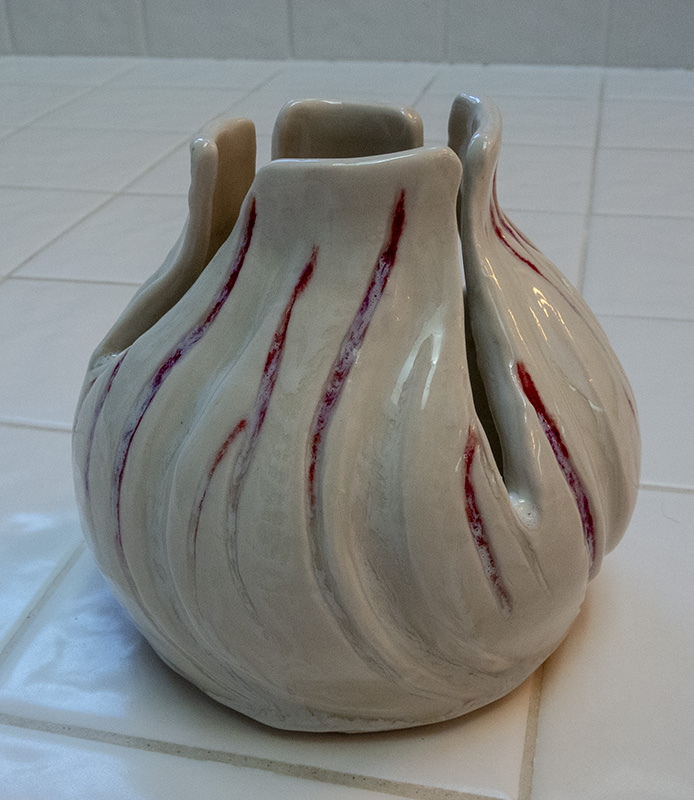
A few years ago, when I was just starting school to study ceramic arts, one of my assignments was to come up with some images of work from other ceramicists that I admired. I found an artist named Jennifer McCurdy who was doing beautiful work with cutout porcelain. I fell in love with her work. And of course, I had to try to try making a cutout piece myself. As a beginner. It fell apart in spectacular fashion of course and I tabled the idea for a few years.

And then a few months ago, Jennifer McCurdy popped up in Clayflicks with a workshop! I signed up immediately and spent an enthralling three hours listening to and watching this talented artist talk about and show how she makes her compelling cutout pieces. Not easy! The entire process ends with turning the piece upside down on a stilt (post) for final firing so that it slumps down with gravity.

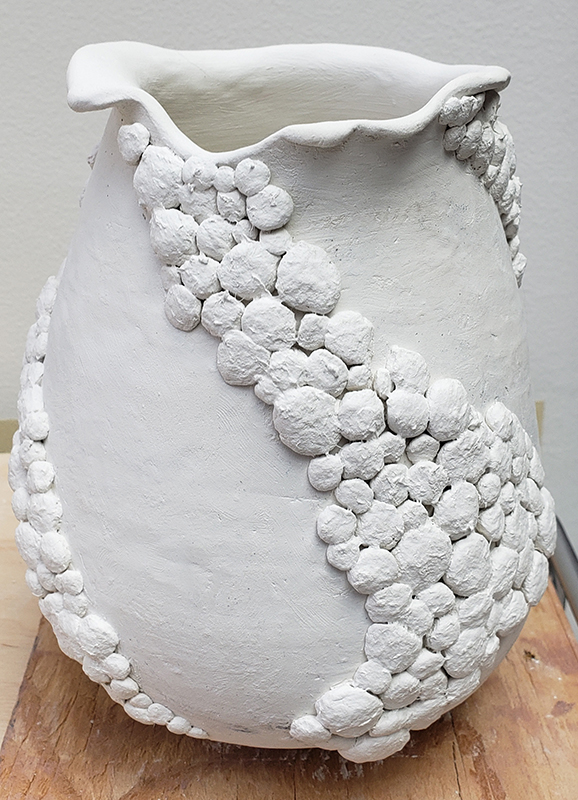
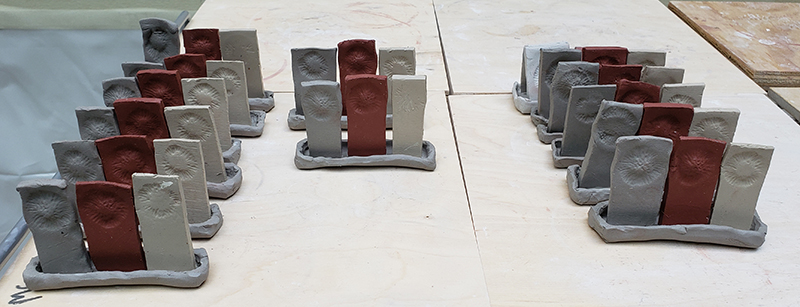
Of course I had to try it again, but without the slump firing. I’m not ready for that yet. And I stayed small. I wanted to see if my piece would stand once I took away a good portion of it. It was a bit touch and go there for a while and I had to repair (successfully) a portion of it that separated from the whole, but in the end, I had a not-too-bad cutaway piece that stands 3.5 inches high and 4 inches wide. In one piece, no cracks!

I’m going to make another one, larger next time and with maybe fewer top supports. We’ll see how it goes.

More of “the Shape”

I’ve been busy making, I really have! But when you’re relying mainly on firing in a small test kiln, things slow down a bit. Sometimes I’m firing every night.

Here is the second wave of pieces that feature “the shape” that I have become obsessed with. I should come up with a better name for it. Maybe “the stretch necks”? In any case, this won’t be the last of it. There are already more in the works. I wanted to create a set of these smallish vases that focuses solely on the shape without any distracting surface decoration other than mostly one-color, mostly opaque glazes. Except for the white, all of these glazes are my own creations. The clay base is “dirty” porcelain.

These vases necessarily need to remain small right now. This shape is hard to throw, at least for me. I’m getting better at it though! The pink vase is larger because the top is made from a rolled out slab. The white decoration on that one is an impression made from the spine of an entire skeletized dolphin I found on a beach last summer.

Catching Up

Recuperating from a leg injury lends itself well to catching up on glazing. Broken kneecap does not work so well with using the wheel. Getting there (two months in). I hope to give the wheel a try again on Monday. Currently working on Dynamic and Asymmetrical Wheel, Project #2.

The bowl at the top was one of my summer projects. The instructor called it a Middle Eastern bowl. Can you imagine it filled with a couscous creation?

The pot with the holes is an orchid pot I made for myself. The orchid looks great in it (as I finally got one to be the correct size)!

The bottom three pots are part of Dynamic and Asymmetrical Wheel, Project #1. I started that project using the form types pictured, but veered early on towards the forms I have previously been showing. I might come back to these eventually, but not right now. I got frustrated with breakage at the top, particularly when using porcelain. The pot with the red interior is porcelain, but I made it thick enough to survive the drying stress. I’m getting better at commanding the clay, but still have a way to go.

A Few Old, One New

FigPlate_20200725_153036CrawlVase_20200722_094734Illuminary_20200722_094909Swoosh_Plate_20200722_094700

The community studio where I often hang out opened back up on a very limited basis a few weeks ago. I’m doing fine working on ceramics at home, but I did pop in to rescue my marooned clay (getting hard) and a couple of pieces that had been bisqued.

The porcelain plate with the swooshes and the…eyes?…is finished with a commercial Amaco clear glossy glaze. I bought some so that I could stop depending on my not-quite-there-yet clear glazes that I’ve been working to develop. The blue luminary sports Amaco’s Storm celadon glaze.

I made the small vase a good while ago, but had never taken it past bisque. It was sitting there waiting for a test glaze. I found just the thing. This won’t be to everyone’s taste–only if you enjoy abstract, experimental art I would say. I had a clear glaze I was working on go wonky and crawly on me, but I was intrigued enough to want to do something with it. I painted on a few swaths of different underglaze blues and rebisqued the vase before painting on the wonky glaze. It did just what I thought it would do. You can see the blue underglaze coming through where the clear glaze shivered and crawled off the surface. I had to take a dremel tool to smooth out the rough, pointy spots. I find it textural and interesting.

The fig plate is new. This started out trying to be a plate thrown with 8 lbs. of clay. Yeah, sure. Not there yet. I was also using some white stoneware I had never tried before. It’s much darker and “dirtier” than I expected, so not really a great candidate for underglaze painting. I think I’ll earmark the rest of that batch for glaze only pieces.


Porcelain and Paper Clay

Remember way back on March 26 when I posted an update about what I was doing while not having access to a kiln? In fact, here, I’ll even give you the link: https://ceramiclectia.wordpress.com/2020/03/26/pottery-in-the-time-of-coronavirus/. Well, I finally finished a couple of those projects. The big bowl with the balls (kind of like this one) that I was repairing with paperclay bit the dust. The paperclay didn’t work on an already bisqued piece that was so large. It came back in even more pieces. Sad. Very sad. But I moved on.

The vase with the blue balls on the left is the only survivor (after I lost that big bowl) of the porcelain workshop I took last fall. It ended up being a crossover project as I affixed paperclay balls (paperclay was my research project for my Clay Materials class) to the outside as decoration. It worked pretty well. I also tried Amaco’s brush-on celadon glaze. The clear comes out very shiny and nice, but unfortunately it covered over the  blue celadon I had painted on under it on the balls. I had to reglaze the piece to get the blue back on. The nice thing about using paperclay for outside decoration is that it’s very light. If I had put clay balls on the outside of this vase, it would have ended up being very heavy.

The square something on the left is all paperclay. If you follow the link in paragraph 1, you’ll see how it started. I’m not sure I would use paperclay to make functional items again. It’s more for sculpture. But it was fun to try this. I had painted green celadon on top of the clear celadon, so there was no having to redo anything. Learning from my experimentation.

My Version of the Terracotta Warriors

TerraCottaWarriors

Update: this didn’t work. The warriors fell apart. Back to the drawing board. Same idea I think, but different construction.

—————————————————————————————————————————————

In the hopes that someday soon—after these days of pandemic quarantine—I’ll be able to be back in a studio that has a kiln in which I can cook my wares, I spent some time making groupings of test tiles. I want to get back to my glaze tests. My big idea was to make small catch plates for glaze overflow into which I anchored three tiles of different types of clay. I used a white stoneware, a very red stoneware, and porcelain. When I can actually get the materials to make glazes again, I have a half dozen or more formulated for cone 6 on paper that I want to try. I’m interested in seeing how each one will do on the different types of clay. I also added a stamped design this time so I can see how the glazes break over texture.

Something to look forward to in these tough times.

Pottery in the Time of Coronavirus

Okay, so we have to stay home. That means I’m marooned without a kiln, but that doesn’t mean I have to stop all pottery activities. For one thing, I’m still a student and I have assignments  due, even if they need to be kilnless right now. So here’s what I’ve been up to during the past few weeks. I’ve been too busy with all of this and more to even think about throwing new things on the wheel, but that day is coming, too.

Lab3_Unfinished
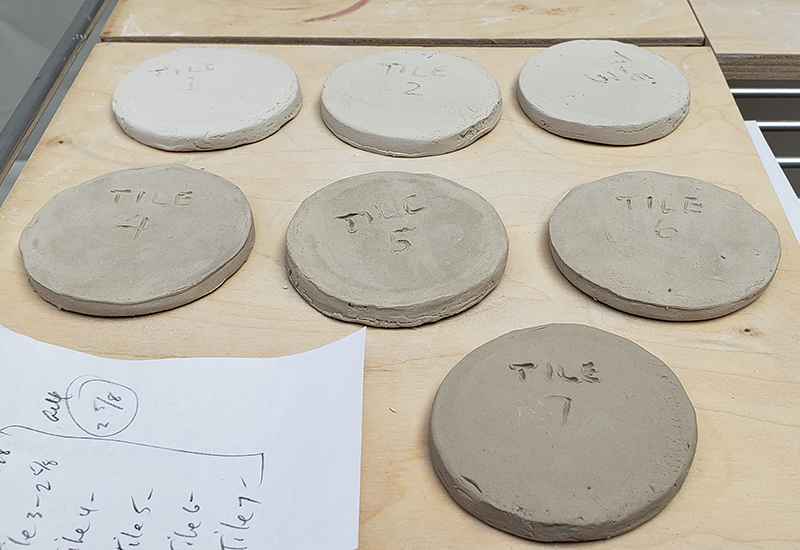
This is Lab 3, for what it’s worth. It has to do with making clay using varying amounts of the same fluxes and measuring for shrinkage. All I can do right now is the wet and green clay shrinkage. Boiling and soaking the fired clay will have to come later.

PorcelainBowl_PaperclayTrial

I’m going to write a research paper on paper clay. But first, I’m playing around (experimenting!) with it. I mixed up some porcelain slip and added toilet paper, even though I assuredly put my family at great risk for running out of this hallowed paper product. Here, I’m using paper clay to attempt to fix hairline cracks that appeared at the bottom and sides of this porcelain piece after bisque. There is supposedly a 50% success rate using this technique. I also painted over the outside porcelain ball decoration to anchor it into place better. I suspect that I’ll have a lot of sanding to do if this is successful. I have a Dremel tool ready…

PorcelainVase_PaperClayBall_Trial

On this porcelain vase, I affixed paper clay balls since they are much lighter than their porcelain counterparts on the big piece above. They stuck really well on leatherhard clay! Can’t wait to see what happens in the firing. These balls have way too much TP in them. I realized that I got the proportions backwards. (Sigh…dyslexia.) I had to go back and make more paper clay with the correct proportions moving forward.

Paperclay_Square_Draft1jpg

And then I decided to try making something completely out of paper clay. Amazing stuff! So hard when it dries. Even the stuff with too much TP. The over TPed paper clay is on the inside. I have been adding the correct stuff to build up the outside. I have been able to use a rolling pin to roll out very thin, very strong, mostly smooth sheets. I’m learning what it takes to affix wet to wet and wet to dry. The really great thing about paper clay is that you can use water to rework it and rework it and rework it.

Stay tuned. Eventually these will either fall apart or turn up as finished work.

Thinking Outside the Box

1stCopper_20200313_220838

I’m branching out into mixed media, specifically post firing additions. Here, I’m experimenting with copper leaf and model paint. Copper leaf is miserable to work with. I’m still picking up small pieces from the floor. At one point, I didn’t think I’d ever get all of it off my fingers. Sucker for punishment that I am, I’m probably not finished with copper leaf yet, but I’m also planning on branching out into copper sheet. I’ve worked with it before. It’ll be difficult in a different sort of way, but worth the trouble I think.

Hard to see here, but the VSB blue I used on both these pots came out quite differently on each. The thin-necked vase on the left is porcelain; the blue is a truer blue. The orchid pot on the left is white clay on which VSB is more blue-green.

Rice Bowl

I call this bowl a “rice bowl” in honor of a Japanese friend and long-time potter at one of my studios who has taken on the role of mentoring me. One day as I was making a bowl, she explained the difference between a bowl rim that curves out (an invitation for people to partake of the food within) and a rim that curves slightly in (representing a personal  and private interaction with the food within). As I was working through the various steps in making this porcelain bowl, she kept commenting on how much she liked it and that it made her feel hungry to look at it.

As always, I was experimenting. I mixed a small amount of robin’s egg blue glaze with clear glaze and painted on a fairly thin coat over a bisqued-in black underglaze design. No running of the underglaze! I was thrilled! I didn’t know what would happen when I mixed a colored glaze with clear. I can see the differentiation, but it’s okay. I plan on trying it again and mixing the two glazes a little more thoroughly to see if it makes a difference. I’m working on a porcelain plate to go with the bowl.

An Experiment

I saw something like this online and wanted to try it. The artist I saw was working much larger and much more abstract, such that her “vases” were more like sculptures than pots to put something in. In any case, my skills are not up there with hers, so I was able to make this smaller, useable porcelain vase. I had originally intended to make the entire thing white, but I got drawn in by color once again. A mistake, I think. But I also think I’d like to try this again.

DSCN5701