So. Being a newly minted graduate student of ceramic arts this summer, I continued my studies into the fall with a class in kiln firing technology. Specifically, a soft-brick gas kiln fired in reduction. Unfortunately, this class occurred simultaneously to a semester-long class in glaze chemistry, so my expertise in cone 10 glazes, in reduction or otherwise, was still little to nothing. I was also not at all familiar with the glazes in the high-fire glaze kitchen.
My first reaction on seeing my pieces come out of the kiln, which had cooked away for more than 12 hours, was disappointment. At the time of glazing, I had completely missed the boat on how carbon monoxide that is formed when the kiln is starved of oxygen goes looking for the iron and copper molecules in the glazes–very specific glazes. I did notice that the more experienced players in our group were clustered around something called Pete’s Cranberry (not red), or something like that. Didn’t sound very red to me. I did, however, see at least one other bucket with “red” in the title. Being one to shy away from crowds, I headed for not only the less crowded buckets, but was also trying to be mindful about which glazes would be food safe as half of my pieces were meant to hold food or drink. And then there was the time factor. The glazing portion of the class was minor compared to theory and actual kiln firing. So, you’re right in guessing that it was a rush. I stuck with safe. And got back boring in return.
But once I got these pieces home, I started to make my peace with them. After all, they were at least well thrown pieces, and the glazes, while not the flashy reds I would have preferred, were mostly attractive, if understated.
A few notes about the pieces pictured above. The sculpture on the top right was a piece I made in a sculpture class over the summer. If you can imagine an under-arm twirl dancing move, that’s what it’s meant to represent. It was not supposed to survive as my sculpting technique when I made it was still subpar. The instructor clucked over it and I had put it aside as non-viable. Two other similar pieces I subsequently made using a coiling technique that was supposed to be strong never made it to the bisque stage without cracking or exploding. Fortunately, stubborn thing that I am, I went back and finished this piece. It has a few cracks in it, one of them showing daylight on the other side, but is otherwise sturdy and intact. Just shows you how unpredictable creating ceramics can be.
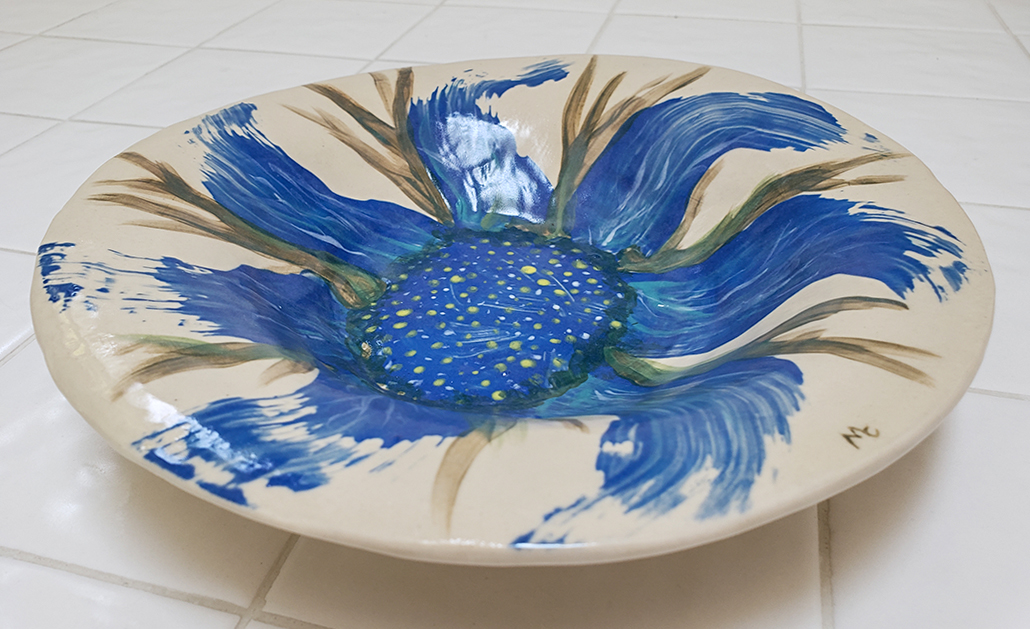
The plate on the top right is rather large (for my throwing skills). Because the glaze buckets were too small to accommodate it for dipping, I brushed on the glaze, as I did for many of the pieces here. After the fact, I found out that a gum substance that can be added to glazes to make them more brushable was not present in these glazes, hence the peeking through of the clay bodies in many spots. I found it most disconcerting on the large plate as it came out looking like something ancient unearthed at an archeological dig. The other problem I had with many of the white looking pieces, which were various combinations of white, yellow, and blue salt glazes, was that these glazes were rather thick. One mug had an interesting surface design that got completely covered over, never to be seen again.
I glazed the two brownish pieces with a red shino. Hmmm…not very red.
The handless cup on the bottom left uses something called a celadon glaze, which is more transparent (I now know). I could have, should have used it on the mug with the surface design. Fortunately I didn’t use any of the heavyweight glazes on my funky hand-built vase (bottom center). I would have lost all of the detail. On that one, I used a red iron oxide wash my instructor helped me make. Sadly, I didn’t seal the bottom of the vase properly and all water poured in pours out just as fast. I will need to buy a plastic or glass insert for it.
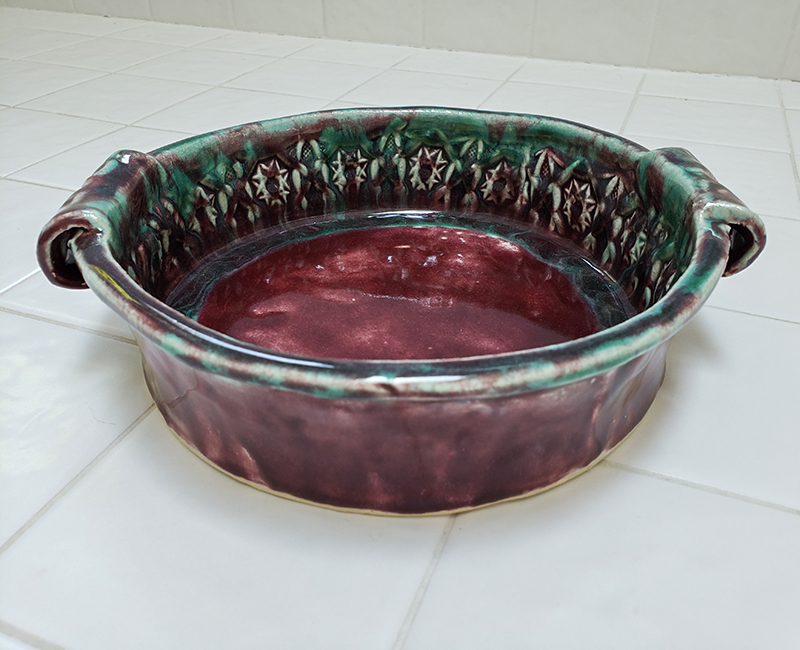
My favorite piece by far is the little bowl on the bottom right. I made that bowl, not at the college using cone 10, high-fire clay, but at the studio where I usually work using cone 6, mid-fire clay. I had heard from salt-fire folks that this particular clay holds up well with interesting results when high-fired in salt reduction. So I made an experiment. To add to the experimentation, I plastered it with a test glaze I made (an assignment) that used the yellow salt glaze as the base and changed the colorant to red. Didn’t work as planned as the colorant I added went on vacation somewhere, but look at the bowl. Didn’t it come out well? It looks like a matte soapstone.
Despite the “interesting” results, I sure did enjoy the entire process. Now that I’m well educated, I definitely need to do another gas kiln reduction firing.